 Pin
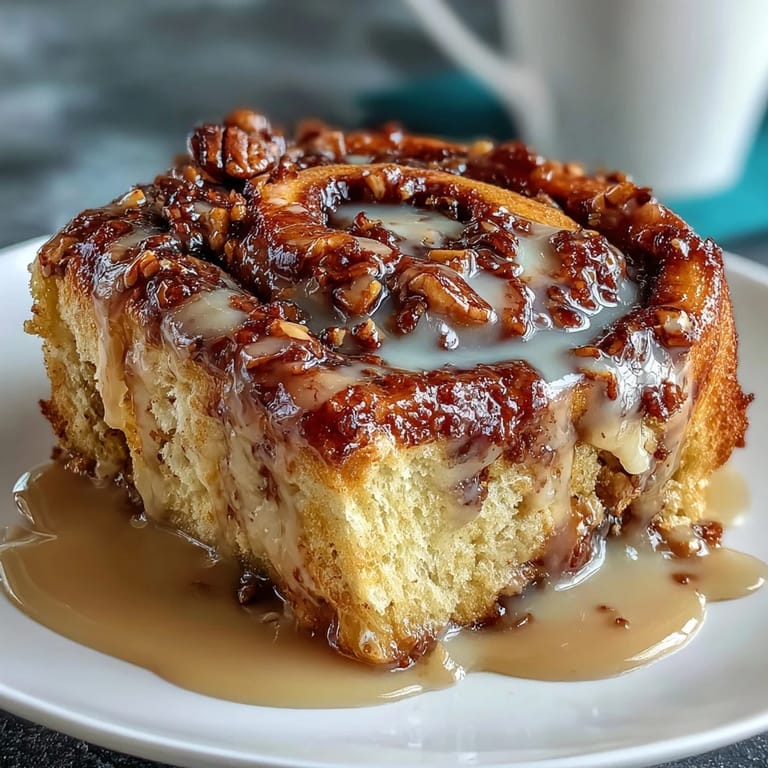
Pin There's something magical about waking up to the smell of orange rolls baking in the oven, especially when you did all the hard work the night before. My neighbor brought a batch to a weekend gathering last spring, and the moment I bit into one—that tender crumb, the brightness of fresh orange singing through every layer—I knew I had to figure out how to make them myself. What surprised me most wasn't how good they tasted, but how forgiving the overnight method turned out to be. No rushing, no stress, just a simple dough waiting patiently in the fridge to become something extraordinary by morning.
I'll never forget the first time I tested this recipe on a Saturday morning when my sister was visiting. She wandered into the kitchen around 8 AM with zero expectations, and the smell alone had her asking questions before I'd even finished drizzling the glaze. By the time those warm rolls hit the plate with their glossy orange coating, she was already reaching for a second one. That moment made me realize these rolls weren't just breakfast—they were the kind of thing that makes people feel cared for, even if you technically made them while they were sleeping.
Ingredients
- All-purpose flour (3 1/2 cups): This is your foundation—don't skip the measuring by weight if you can, as it keeps the dough from getting too dense.
- Granulated sugar (1/4 cup for dough, 1/2 cup for filling): Sugar feeds the yeast and sweetens the dough, so it needs to be distributed properly for even rising.
- Instant dry yeast (2 1/4 tsp): Make sure this is fresh and hasn't been sitting in your pantry for months—old yeast means slow or failed rises.
- Salt (1/2 tsp): A small amount keeps the yeast from going wild and balances the sweetness beautifully.
- Whole milk, lukewarm (3/4 cup): Lukewarm means around 110°F—too hot kills the yeast, too cold and it won't activate.
- Unsalted butter, melted (1/4 cup for dough, 1/4 cup softened for filling): Melted butter in the dough keeps it tender; softened butter for filling spreads evenly without tearing the dough.
- Large eggs, room temperature (2): Cold eggs won't mix smoothly into the dough, so pull them out 30 minutes before you start.
- Fresh orange zest (3 tbsp total): Use a microplane to get fine, flavorful zest without the bitter white pith—this is where all the orange magic happens.
- Powdered sugar (1 cup for glaze): Sift it if you have lumps so your glaze stays smooth and doesn't streak.
- Fresh orange juice (2-3 tbsp): Freshly squeezed makes a difference; bottled juice can taste flat by comparison.
Tired of Takeout? 🥡
Get 10 meals you can make faster than delivery arrives. Seriously.
One email. No spam. Unsubscribe anytime.
Instructions
- Mix the dry ingredients:
- Whisk together your flour, sugar, yeast, and salt in a large bowl—this distributes the yeast evenly so your dough rises predictably. The dry mixture should look uniform with no yeast clumps.
- Combine the wet ingredients:
- In another bowl, warm your milk to around 110°F (you can test this on the inside of your wrist), then stir in the melted butter, eggs, and orange zest. You'll see little flecks of zest throughout—that's exactly what you want.
- Bring it together:
- Pour the wet mixture into the dry ingredients and mix until a shaggy, sticky dough starts to form. Don't worry if it looks messy at this stage; that's normal.
- Knead until silky:
- Using a stand mixer with the dough hook or your hands, knead for 7-8 minutes until the dough becomes smooth and elastic. You'll feel it transform from sticky to supple, and it should bounce back slightly when you poke it.
- First rise overnight:
- Transfer the dough to a greased bowl, cover tightly with plastic wrap, and refrigerate overnight (or up to 24 hours). The cold slows fermentation, which actually develops better flavor.
- Shape and fill:
- Roll out your cold dough on a lightly floured surface into a 10x16-inch rectangle. Spread softened butter over the entire surface, then sprinkle the sugar and orange zest filling evenly across the top.
- Roll tightly:
- Starting from the longer edge, roll the dough away from you as tightly as you can without squeezing out all the filling. A bench scraper helps keep the roll even.
- Cut with intention:
- Using a sharp knife or dental floss (floss works surprisingly well), cut the log into 12 equal rolls. Try to cut cleanly in one motion rather than sawing, which squashes the dough.
- Second rise in the pan:
- Arrange your rolls cut-side up in a greased 9x13-inch baking dish, cover with plastic wrap, and refrigerate overnight. In the morning, remove from the fridge and let them sit at room temperature for 45-60 minutes until puffy and jiggly.
- Bake until golden:
- Preheat your oven to 350°F and bake for 22-25 minutes until the rolls are deep golden brown. You want the tops to caramelize slightly, but not burn.
- Glaze while warm:
- While the rolls bake, whisk together powdered sugar, fresh orange juice, and zest until you have a smooth drizzle-able consistency. Pour generously over the warm rolls so it soaks into the crevices.
 Pin
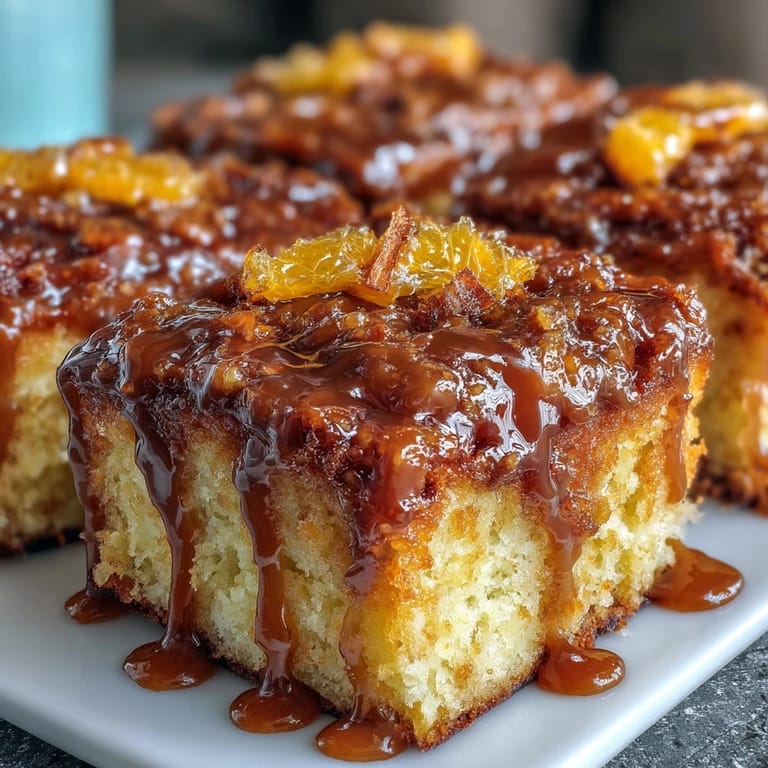
Pin I learned the hard way that orange juice can sometimes overshadow the delicate flavor of fresh zest, so I started using mostly fresh zest with just a touch of juice in the filling. That small shift made all the difference—suddenly you could actually taste the orange instead of just the sweetness. Now when people eat these rolls, they ask if I'm using some secret ingredient, and the answer is just respecting how bright fresh citrus really is.
The Overnight Magic
The beauty of preparing these rolls the night before isn't just about morning convenience—it's about how cold fermentation actually improves the dough. As the rolls sit in your fridge, the yeast works slowly, developing complex flavors that a quick same-day rise can't match. The dough also becomes easier to handle because the gluten has relaxed, and you get a tender, almost custard-like crumb that's impossible to rush.
Orange Zest Secrets
The difference between these rolls and mediocre ones comes down entirely to fresh orange zest. Microplane zesting is non-negotiable here—it gives you those bright, fine particles without the bitter white pith that box graters sometimes catch. I've learned to zest my oranges the night before I make the dough so I can measure accurately and avoid any waste, and the zest actually gets more fragrant as it sits.
Timing and Temperature
Temperature matters more than time in baking, which is why I always pay attention to how my dough looks and feels rather than just watching the clock. A puffy, jiggly roll ready to bake will be noticeably softer and more forgiving than one that's underdone, and that 45-60 minute window in the morning is just a guideline based on a 70°F kitchen. Your environment might be warmer or cooler, so trust your eyes and instincts.
- If your kitchen is cold, set the rolls on top of the warm oven (before it preheats) to encourage rising.
- The glaze should be thick enough to coat a spoon but loose enough to drizzle—if it's too stiff, add juice one teaspoon at a time.
- These rolls are best eaten the day they're baked, but leftovers keep well wrapped and toasted the next morning.
 Pin
Pin These rolls have become my go-to for company because they feel like a luxury breakfast, yet they require almost no morning effort. There's something deeply satisfying about pulling warm, fragrant rolls from the oven and knowing that breakfast is handled—leaving you free to actually enjoy the people at your table instead of being stuck in the kitchen.
Recipe FAQ
- → How do I achieve a fluffy texture in these rolls?
Proper kneading and adequate rising time are key. Knead the dough until smooth and let it rise until doubled for light, airy rolls.
- → Can I add spices to enhance the flavor?
Yes, adding a pinch of cardamom or cinnamon to the filling can add subtle warmth and complexity to the rolls.
- → Is it possible to substitute milk in the dough?
For a richer flavor, replace half the milk with fresh orange juice to boost the citrus aroma in the dough.
- → What’s the best way to cut the roll slices evenly?
Use a sharp knife or dental floss to cut the rolled dough into even portions without squashing the dough.
- → How long should the rolls sit before baking?
After refrigerated overnight, let the rolls rest at room temperature for 45–60 minutes until puffed before baking.