Pin
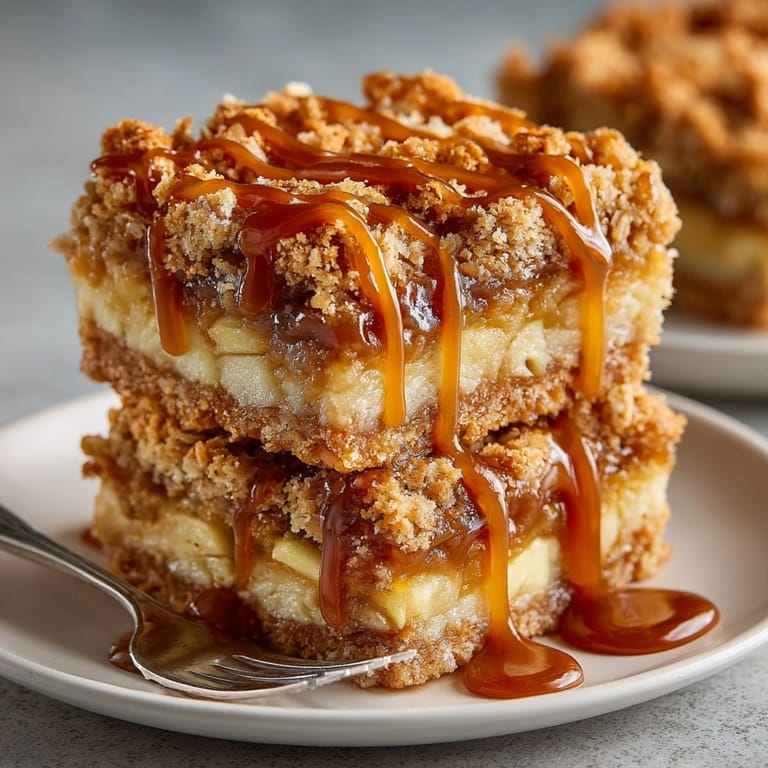
Pin Salted Caramel Apple Crisp Bars are the ultimate comfort treat when you want something sweet, seasonal, and a little bit rustic. Tender apples melt into a layer of tender, spiced fruit sandwiched between the dreamiest buttery base and a thick oat crumble, all finished with a drizzle of homemade salted caramel. Every bite tastes like a cozy autumn celebration, though I will happily bake these any time of year for gatherings or lazy afternoons.
The first time I made these, my house smelled like cinnamon and buttery caramel for hours. Both kids and adults demolished the pan at a family potluck, and now this is my signature holiday dessert. You truly cannot go wrong with buttery crumble plus gooey salted caramel.
Ingredients
- All-purpose flour: provides structure for both crust and crumble layers Choose a fresh bag for best texture and check for no lumps
- Old-fashioned rolled oats: bring that classic crumbly texture The bigger flakes make the topping hearty and satisfying so avoid quick oats if possible
- Light brown sugar: boosts caramel notes and softness Look for moist, clump-free sugar for max flavor
- Granulated sugar: adds sweet stability to both layers Ensure it is fresh so it dissolves smoothly
- Ground cinnamon: infuses warmth and echoes fall flavor Make sure your jar is fragrant and not faded for the best taste
- Fine sea salt: sharpens flavors and balances the caramel Use a good-quality salt for both crumble and finishing
- Unsalted butter: supplies richness and helps the crust set Melt gently and use fresh for premium results
- Apples: the star Use crisp baking varieties like Honeycrisp or Granny Smith Dice evenly for even baking and peel thoroughly for best texture
- Nutmeg and lemon juice: give zing and a touch of complexity Fresh nutmeg and real lemon juice make all the difference
- Heavy cream and unsalted butter: are essential for velvety caramel Always use fresh dairy and real butter
- Flaky sea salt: is the crowning finish Seek out a flaky variety for dazzling spark and contrast
Tired of Takeout? 🥡
Get 10 meals you can make faster than delivery arrives. Seriously.
One email. No spam. Unsubscribe anytime.
Instructions
- Preheat and Prepare:
- Preheat your oven to 350 degrees Fahrenheit 175 degrees Celsius Line an 8 by 8 inch baking pan with parchment paper ensuring extra overhang on the sides for effortless removal
- Make the Crust and Crumble:
- In a large bowl add the flour oats brown sugar granulated sugar cinnamon and salt Mix thoroughly with a whisk or your fingers until well blended Pour the melted butter over the dry mix Stir carefully until all the dry bits are moistened and you see clumps forming
- Form the Base:
- Take two thirds of this mixture and press it firmly into the prepared pan creating an even bottom layer Press well into the corners for sturdy bars Reserve the remaining third for the crumble topping
- Prepare the Apple Filling:
- In a separate bowl toss your diced apples with granulated sugar cinnamon nutmeg flour and fresh lemon juice Mix until every piece of apple is coated The flour helps thicken the juices as the apples bake
- Layer the Apples:
- Spread the apple filling evenly over the pressed crust Use a spatula to distribute the fruit right to the edges so every bite is filled with spiced apple goodness
- Add the Crumble Topping:
- Sprinkle the remaining crumble mixture all over the top of the apples breaking up any big clumps for a rustic look Press down very gently so the topping stays in place without packing it flat
- Bake:
- Slide the pan into your preheated oven and bake for about thirty five to forty minutes The bars are ready when the top is golden brown and you can smell the buttery oats The apples should be bubbling slightly at the edges Remove pan and cool completely before moving on
- Make the Salted Caramel:
- While the bars cool place the granulated sugar and water in a small heavy bottomed saucepan over medium heat Stir softly until the sugar dissolves Once clear stop stirring and let it bubble until the color turns a deep amber six to seven minutes Watch closely to prevent burning Remove from the heat and immediately whisk in cubed butter It will bubble vigorously Whisk in heavy cream until smooth then finish with flaky sea salt Allow to cool slightly so it thickens
- Assemble and Serve:
- Once the bars are fully cooled use the parchment ends to lift them from the pan Drizzle the warm salted caramel generously over the bars Cut into sixteen squares Wipe your knife between cuts for cleaner edges
 Pin
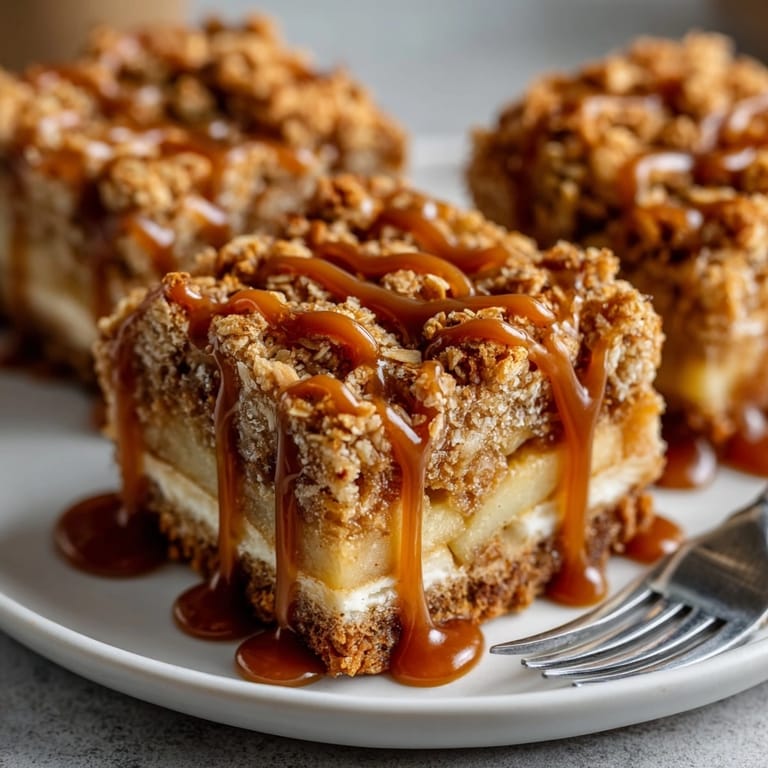
Pin My favorite part of these bars is the moment you drizzle over the salted caramel The aroma is absolutely intoxicating and I always sneak a little spoonful for myself My whole family gathers in the kitchen to cut the bars together and someone inevitably tries to grab the first gooey square
Storage Tips
For ultimate freshness store bars in an airtight container in the fridge They last up to four days Withhold the caramel if you want to keep the bars crisp then add it just before serving If you like them warm pop a square in the microwave for ten seconds
Ingredient Substitutions
Swap apples for firm ripe pears for a delicate twist For a gluten free version use a trusted one to one flour blend Replace butter with a good plant based option if you need dairy free If you want extra warmth try adding a pinch of ground ginger to the apple layer
Serving Suggestions
These bars are dreamy as they are but a scoop of vanilla bean ice cream takes them over the top For a brunch treat serve slightly warm with a dollop of Greek yogurt and toasted pecans For parties cut into small pieces and pile on a platter for an irresistible finger food dessert
Cultural and Historical Context
This recipe is inspired by the classic American apple crisp a mainstay at fall gatherings and potlucks The transformation into a bar form means you can pack it in lunchboxes or bring it on autumn picnics with no fuss Salted caramel gives a modern touch to a humble favorite
Seasonal Adaptations
Swap in fresh pears or even peaches when apples are out of season Mix in dried cranberries or golden raisins for holiday flair Try a handful of chopped nuts for added crunch and heartiness
Success Stories
The first time I made this recipe for a school bake sale I was worried the bars would be too messy but they held up perfectly and disappeared in minutes Later my neighbor requested the recipe and now it has become our neighborhood tradition
Freezer Meal Conversion
Let the bars cool completely before cutting Freeze on a parchment lined tray then store in a freezer bag for up to two months Thaw at room temperature and add caramel just before serving for that freshly baked taste
 Pin
Pin The best way to savor these bars is with friends and family Cut them small and enjoy warm with caramel on top You will be asked for the recipe over and over
Recipe FAQ
- → What kind of apples work best?
Firm, tart varieties like Granny Smith or Honeycrisp hold their shape and balance sweetness beautifully in these bars.
- → Can I make ahead and store them?
Yes, store cooled bars in the refrigerator for up to 4 days. Add caramel drizzle just before serving for best results.
- → How do I get a crisp crumble topping?
Use cold melted butter and mix crumble ingredients until just combined. Bake until golden brown for a perfect crunchy texture.
- → Can I substitute pears for apples?
Absolutely! Swapping in diced pears gives the bars a unique twist, while following the same steps as with apples.
- → Is this dessert suitable for vegetarians?
Yes, all ingredients are vegetarian-friendly. For a vegan option, substitute non-dairy butter and cream.
- → Are there nut-free alternatives?
Simply omit nuts or add seeds if you'd like a crunchy element without tree nuts.